How to Receive Crypto on Trezor Wallet: Complete 2026 Guide
How to Receive Crypto on Trezor Wallet: Complete 2026 Guide
CrisCoin 10 min readTrezor
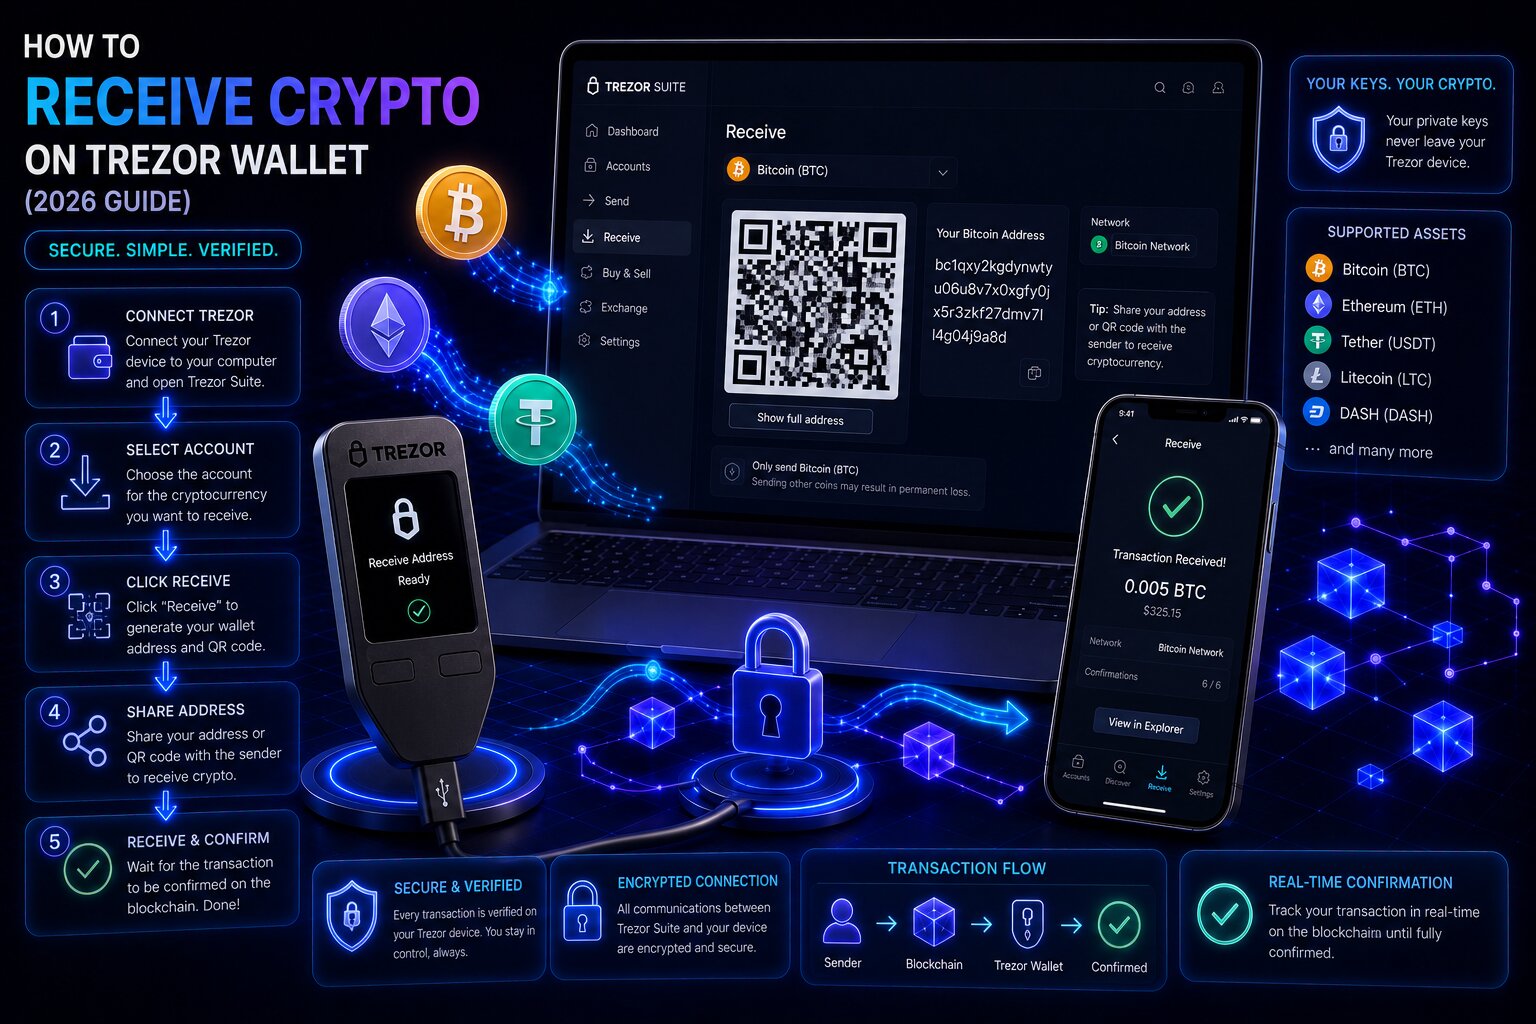
Receiving crypto on Trezor Wallet generates a deposit address through the companion application and verifies it against the hardware device screen before sharing it with the sender.
The address displayed on the device screen is cryptographically derived from the private key inside the Secure Element — it cannot be altered by software running on the connected computer.
Receive Step
Platform
Critical Action
Select account
Wallet interface
Match account to asset and network
Generate address
Wallet interface
Click Receive → Show full address
Verify address
Hardware device screen
Compare against wallet interface
Share address
After device confirmation
Copy, share, or QR code
Monitor arrival
Wallet dashboard
Wait for required confirmations
What Does Receiving Crypto on Trezor Involve?
Receiving crypto is the process of generating a deposit address, verifying it on the hardware device screen to confirm it has not been manipulated, and sharing the verified address with the sender. The cold storage device never needs to be connected at the moment of receipt — funds arrive at the blockchain address regardless of whether the hardware signer is plugged in.
Bitcoin generates a fresh address for every new receive transaction — the HD wallet derives each from the same seed without reusing previous addresses. Ethereum, Solana, XRP, and most non-Bitcoin chains use a single fixed address per account.
Why Does Trezor Require Address Verification on the Device Screen?
Address verification protects against two attack categories: malware that substitutes addresses in the wallet interface, and phishing sites that display attacker-controlled addresses disguised as Trezor deposit screens. The hardware device derives receive addresses independently of the connected computer — the address on the device screen is always a valid address belonging to the wallet.
If the address displayed in the companion application does not match the device screen, the computer is infected with address-substitution malware and no addresses from that machine should be trusted until the malware is removed.
How Do You Receive Crypto — Step by Step?
Receiving Bitcoin
1
Select account
Connect and unlock, then Accounts → select the Bitcoin account (Taproot, SegWit, or Legacy SegWit).
2
Show full address
Click Receive → Show full address, prompting device verification.
3
Verify and confirm
Compare every character against the wallet interface and press confirm on the device.
4
Share and monitor
Share the address or QR code, then wait for 3-6 confirmations (~30-60 minutes) before treating funds as final.
Receiving Ethereum and ERC-20 Tokens
Ethereum and all ERC-20 tokens share the same 0x address — receiving USDC, USDT, LINK, or any ERC-20 token requires no address configuration beyond the standard Ethereum receive flow. ERC-20 tokens appear automatically once received — no manual token addition is required. ETH itself is required in the account for gas to spend received tokens later.
Receiving USDC sent on the Polygon network into an Ethereum mainnet account results in funds on the wrong chain — the account network selector must match the sender’s network.
Receiving XRP — Destination Tag Required
XRP uses a single fixed address per account, but centralized exchanges require a destination tag alongside the address to attribute the deposit to the correct user account. Note both the XRP address and Destination Tag, and enter both on the exchange withdrawal page. Sending XRP without a destination tag routes funds to the exchange’s master pool, requiring support to recover.
Bitcoin Address Types — Taproot, SegWit, and Legacy
Address Type
Format Prefix
Fee Efficiency
Default in 2026
Taproot (P2TR)
bc1p…
Highest
Yes
Native SegWit (P2WPKH)
bc1q…
High
Legacy default
Legacy SegWit
3…
Medium
Transitional
Legacy (P2PKH)
1…
Lowest
Oldest format
Taproot is the default new Bitcoin account type in Trezor Suite 2026 — it provides the lowest transaction fees and strongest on-chain privacy through Schnorr signatures. Use Native SegWit as the fallback if a sender’s platform doesn’t yet support Taproot.
Why Does Trezor Show a Different Bitcoin Address Each Time?
Trezor generates a new Bitcoin receive address for every incoming transaction using HD wallet (BIP-32/BIP-44) derivation. Each fresh address is mathematically derived from the same master seed — all fresh addresses belong to the same account and all received funds are accessible through a single recovery.
Behavior
Address Reuse
Fresh Address Per Transaction
Funds received correctly
Yes
Yes
Transaction privacy
Reduced — linked on-chain
Better — unlinkable
Recommended practice
No
Yes
How Many Confirmations Does Trezor Need to Receive Bitcoin Safely?
The device screen is the only trusted verification surface — verification cannot be skipped for high-value receives.
The companion application can display addresses without the device connected (cached extended public key) — but unverified addresses should not be shared.
Trezor Suite Lite on Android allows address verification with a connected device without the desktop application.
Test receives — sending a small amount first — remain the safest practice for large inbound transfers.
Common Mistakes When Receiving on Trezor
Avoid These Errors
Sharing an address without device verification — man-in-the-middle risk
Wrong EVM network selected — verify the account name matches the sender’s network
ERC-20 token sent to the wrong EVM chain — confirm the network with the sender first
XRP received without a destination tag — always provide both address and tag
Not waiting for confirmations — wait for 3-6 BTC confirmations before spending
Frequently Asked Questions
Connect the device, select the correct account, click Receive → Show full address, verify on the hardware device screen, press confirm, then share the verified address or QR code with the sender.
Trezor generates a fresh Bitcoin address for every receive transaction using HD wallet derivation, improving privacy by preventing on-chain linking. Ethereum, Solana, and XRP always use the same fixed address.
Select the Ethereum account → Receive → Show full address → verify on device screen → share. All ERC-20 tokens are received automatically at the same 0x address — no token-specific setup required.
Trezor Suite recommends 3-6 confirmations (~30-60 minutes at Normal fee). Most exchanges require the same before crediting deposits. EVM Layer 2 networks achieve finality in under one minute.
Select the XRP account → Receive → verify on device screen. Note both the address and Destination Tag — both are required when withdrawing from a centralized exchange.