How to Connect Trezor – First-Time Setup and Third-Party Wallet Guide
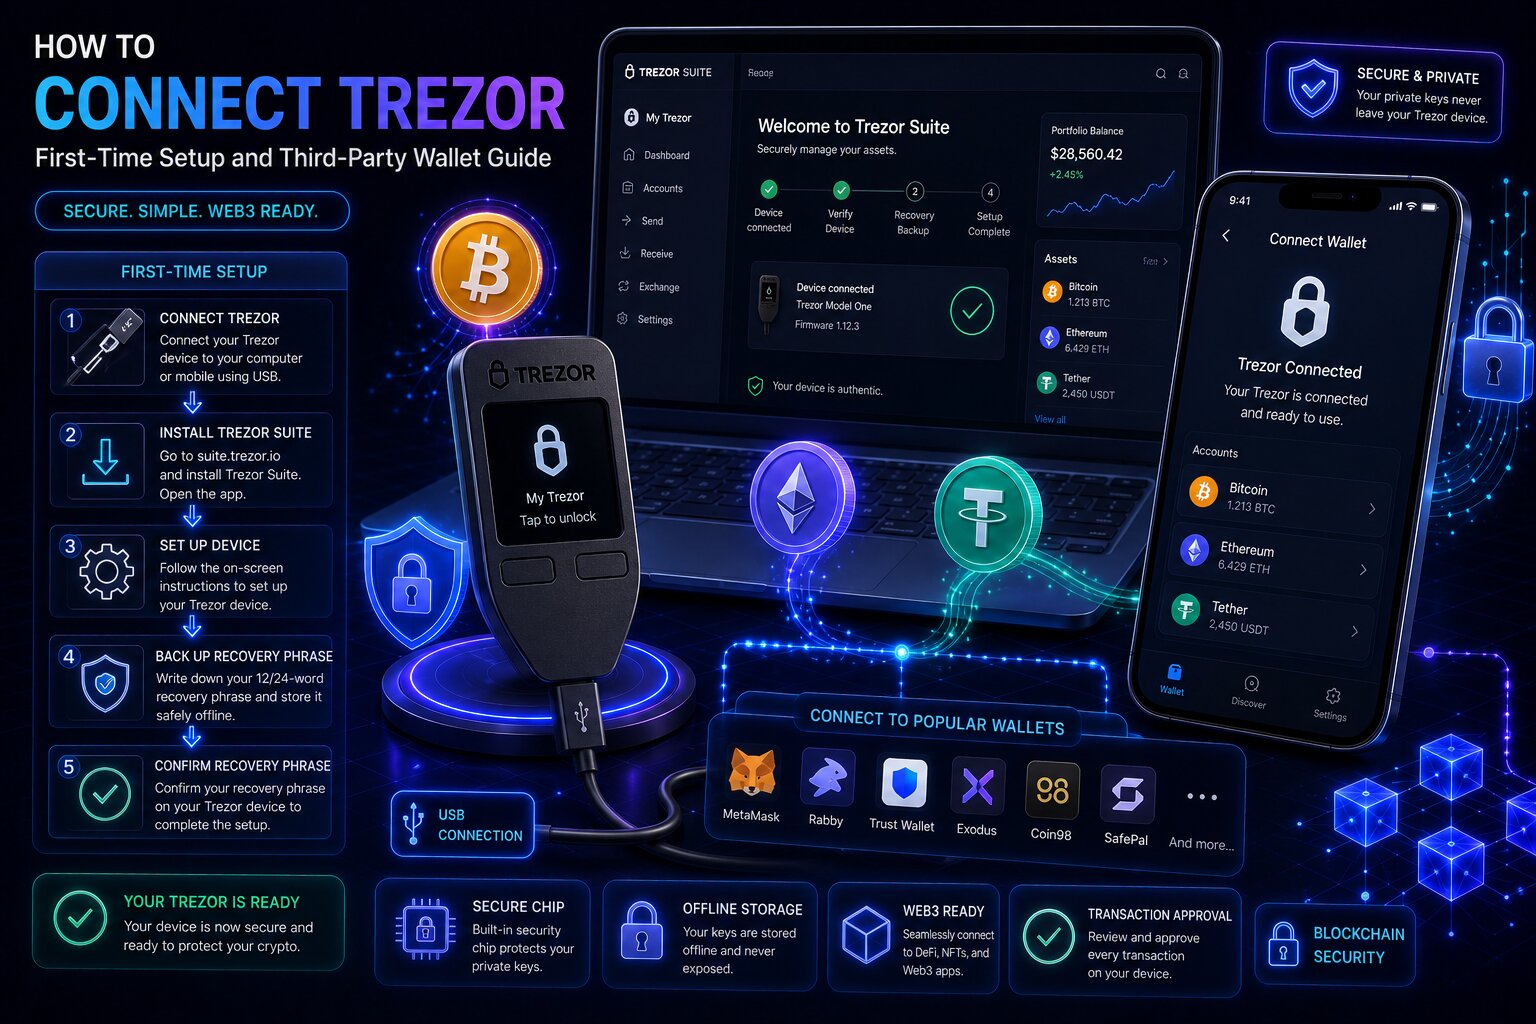
Connecting Trezor links the hardware wallet to Trezor Suite, MetaMask, or WalletConnect so transactions can be signed without exposing private keys to internet-connected software. Two distinct paths exist: first-time device initialization (firmware install β seed backup β PIN setup), and third-party pairing for DeFi access. Total initialization time is approximately 15 minutes.
| Connection Path | Use Case | Tool Required | iOS Support |
| First-time setup | Initialize new cold wallet | Trezor Suite desktop or Android | Safe 7 (BT) only |
| MetaMask pairing | EVM DeFi, custom networks | MetaMask browser extension | No |
| WalletConnect | Direct dApp authentication | Trezor Suite (built-in) | Safe 7 (BT) only |
| Electrum / Exodus / Rabby | Bitcoin advanced, multi-chain | Third-party app | Limited |
- Trezor requires users to install firmware during first setup to prevent supply-chain firmware tampering – the device ships as a blank signer with no pre-loaded software.
- The hardware signer approves every transaction by physical button confirmation – MetaMask, WalletConnect, and all third-party apps initiate transactions but cannot authorize them without user interaction on the device.
- WebUSB handles browser-based device communication in most modern Chromium browsers – Safari does not support WebUSB, limiting web-app connections on macOS to Firefox or Chrome.
What does connecting Trezor involve β and which path applies to you?
Connecting Trezor links the hardware signer to a companion app or protocol so wallet operations – address generation, transaction signing, account discovery β execute with private keys isolated in the device’s tamper-resistant security module. The correct path depends on model, platform, and intended use.
- Private keys are derived deterministically from the recovery seed using BIP-32 Hierarchical Deterministic wallet architecture β the same seed always generates the same accounts via the same derivation path.
- Trezor Suite is the official companion app that manages firmware, account creation, portfolio tracking, and native trading β available as a desktop app, web app, and mobile app.
- WalletConnect removes browser-extension dependency during dApp authentication β pairing happens through a QR code scanned inside Trezor Suite, establishing a direct protocol channel between the cold wallet and the dApp.
Which Trezor model do you have β and how does it affect the connection?
| Model | Price | Connection | Secure Element | iOS Full Access | Screen | Backup Standard |
| Safe 3 | ~$79 | USB-C | EAL6+ | View-only | 0.96″ mono, 2 buttons | SLIP-39 (12-word default) |
| Safe 5 | ~$129 | USB-C | EAL6+ | View-only | 1.54″ touch, haptic | SLIP-39 (20-word Shamir) |
| Safe 7 | ~$169+ | USB-C + BT | EAL6+ | Full (Bluetooth) | Touchscreen | SLIP-39 Shamir |
| Model One | ~$49β69 | Micro-USB | None | View-only | Small mono, 2 buttons | BIP-39 (24-word only) |
- Model One lacks an EAL6+ certified Secure Element β its private key isolation relies on software-enforced memory separation rather than a dedicated cryptographic chip, making it less resistant to physical side-channel attacks.
- Safe 3/5/7 implement EAL6+ certified Secure Element chips with secure boot chain verification β each firmware update is cryptographically signed by Trezor, and the chip verifies the signature before loading any new code.
- Safe 7’s Bluetooth connection uses encrypted wireless communication β it is the only model providing full iOS functionality because USB-C connections are not supported for hardware wallet operations on iPhone and iPad.
How do you connect Trezor for the first time – step by step?
First-time initialization follows a fixed authentication sequence designed to establish firmware integrity, device authenticity, and key custody before any blockchain interaction.
Steps β Safe 3 / Safe 5 first-time initialization:
- Download Trezor Suite desktop app from suite.trezor.io β only from the official domain. WebUSB-based browser connections work in Chrome and Firefox but not Safari.
- Connect the cold wallet via the included USB-C cable β the device powers on automatically and Trezor Suite detects it through the HID protocol layer.
- Suite displays the Device security check β this challenge-response verification confirms the device responds correctly to authentication queries. Click Set up my Trezor.
- Suite detects no firmware and prompts installation β select Standard firmware (all supported coins) or Bitcoin-only firmware based on asset requirements.
- Suite displays the firmware fingerprint β verify the hash shown in Suite matches the hash displayed on the device screen before confirming installation.
- The cold wallet restarts automatically after firmware installs via the secure boot chain β the Secure Element verifies the firmware signature before loading it.
- Safe 3 and Safe 5 run the Secure Element authenticity check β a cryptographic challenge-response protocol confirming the chip was manufactured by Trezor and has not been replaced or cloned.
- The device launches the “Know your Trezor” orientation tutorial.
- Select Create a new wallet β the Secure Element’s hardware entropy generator produces the master seed using cryptographically secure random number generation.
- Write every word of the recovery seed in exact numbered order on the provided card β never photograph, type, or copy digitally.
- Confirm the seed by re-entering randomly selected words on the device screen when prompted.
- Set a PIN Code β 4 to 50 digits, entered on a randomized number grid displayed on the device to prevent keystroke logging.
- The cold wallet is initialized β Trezor Suite loads the portfolio dashboard with account discovery complete.
Model One setup requires Trezor Suite Desktop only β the web app and all iOS devices cannot complete Model One initialization due to USB and WebUSB architecture constraints.
Why does Trezor ship without firmware – and how is firmware integrity verified?
Trezor requires users to install firmware during first setup to prevent supply-chain firmware tampering. A device shipped with pre-installed firmware could contain modified code that exfiltrates key material β requiring user-initiated firmware installation from Trezor’s servers eliminates this vector.
- Firmware signing ensures only Trezor-authorized code runs on the device β each firmware binary is signed with Trezor’s private key, and the Secure Element verifies the cryptographic signature before executing any new firmware version.
- The firmware fingerprint is a cryptographic hash of the firmware binary β matching it independently on both the Suite interface and the device screen confirms the same verified binary was received by both systems.
- Firmware rollback protection prevents downgrading to older versions with known vulnerabilities β the Secure Element records the minimum allowed firmware version and rejects installation of older builds.
- Tamper-evident packaging provides physical anti-tamper verification β holographic seals and factory-sealed boxes give visible evidence of any unauthorized access before the user receives the device.
What is the difference between Standard and Bitcoin-only firmware on Trezor?
| Firmware Type | Supported Assets | Code Attack Surface | Best For |
| Standard | BTC, ETH, SOL, ADA, XRP, 9,000+ | Larger β all coin parsers loaded | Multi-chain portfolio |
| Bitcoin-only | Bitcoin exclusively | Minimal β single protocol parser | Bitcoin-focused, maximum attack surface reduction |
- Bitcoin-only firmware removes non-Bitcoin transaction parsers, reducing exploitable code paths within the signing environment β a smaller codebase has fewer potential vulnerabilities in EVM contract parsing or altcoin transaction logic.
- Standard firmware can be switched to Bitcoin-only (and vice versa) through Trezor Suite Device Settings β the device wipes during the switch but the recovery seed restores all accounts immediately.
How do you back up the Trezor recovery seed during first-time setup?
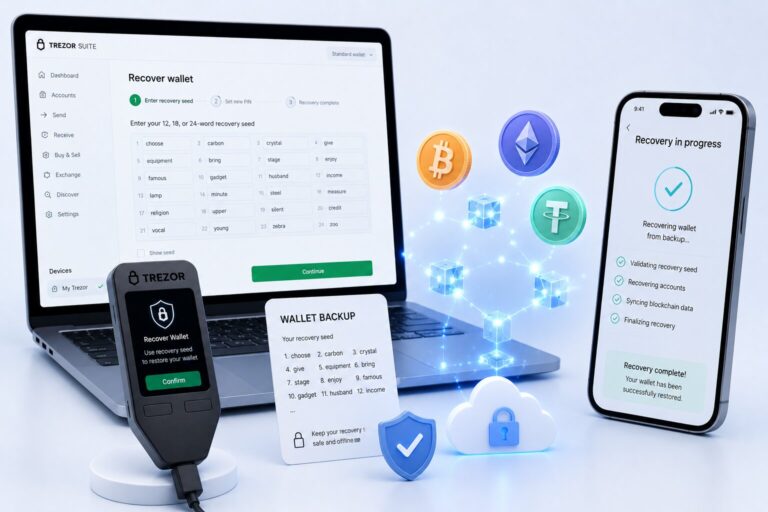
The recovery seed β a human-readable encoding of the master private key generated from hardware entropy β is the sole cryptographic backup mechanism. All private keys for all supported blockchains are derived deterministically from this single seed via BIP-32 and BIP-44 derivation paths.
| Backup Format | Standard | Word Count | Threshold Recovery | Model Support |
| Standard BIP-39 | BIP-39 | 12 or 24 words | Single share β all-or-nothing | Model One |
| Shamir Backup | SLIP-39 | 20 words per share | Multi-share threshold (e.g. 2-of-3) | Safe 3/5/7 |
- SLIP-39 (Shamir Secret Sharing for Mnemonic Codes) splits the master seed into multiple independent shares using threshold cryptography β a 2-of-3 scheme means any two of three share locations reconstruct the wallet, protecting against single-location loss or theft.
- A SLIP-39 share has no value alone β an attacker obtaining one share from a 2-of-3 scheme cannot reconstruct the wallet without a second share.
- Safe 5 generates a 20-word SLIP-39 Shamir Backup by default β the 20-word share format encodes 128 bits of entropy with error-detection metadata using the SLIP-39 word list (distinct from BIP-39).
After securing the recovery seed, the cold wallet is ready to pair with software wallets and DeFi protocols without exposing the seed phrase at any point in the connection process.
How do you connect Trezor to MetaMask for DeFi β step by step?
Pairing Trezor with MetaMask routes Ethereum transaction signing through the hardware signer while MetaMask handles network configuration, account display, and dApp interaction. MetaMask initiates but cannot authorize β every transaction requires physical confirmation on the device.
Steps β Trezor + MetaMask pairing:
- Connect the cold wallet via USB and enter the PIN Code to unlock.
- Open the MetaMask browser extension and unlock it.
- Click the account selector β Add account or hardware wallet β Hardware wallet β Trezor.
- MetaMask opens a popup β the device may request approval for public key export on the device screen.
- Approve public key export β MetaMask receives the extended public key (xpub) and derives Ethereum addresses locally without accessing private keys.
- Select one or more Ethereum accounts from the displayed list β click Unlock.
- The Trezor account appears in MetaMask with a hardware key icon β transactions from this account require physical button confirmation on the device.
- Can MetaMask control Trezor funds? No. MetaMask receives only the extended public key (xpub) β it can derive addresses and display balances but cannot sign transactions without the hardware signer’s approval.
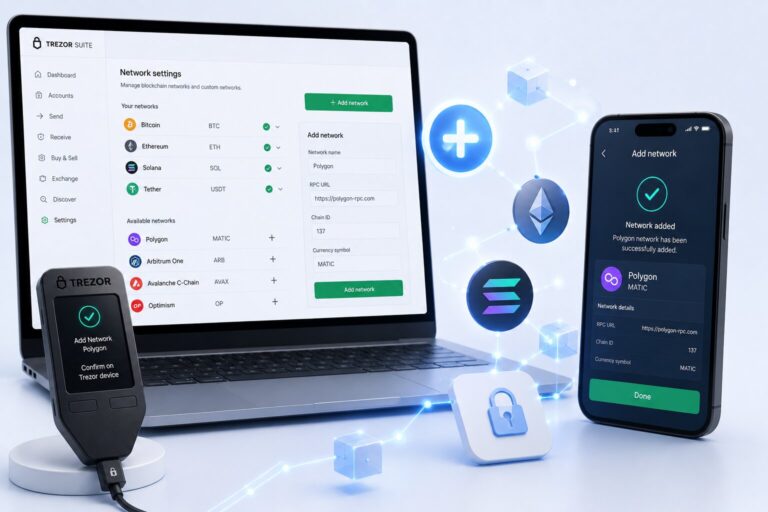
- Custom EVM networks added in MetaMask (Arbitrum, Base, BNB Chain, Polygon) work with the connected hardware account β the signer approves transactions on any EVM chain MetaMask configures.
While MetaMask focuses on EVM networks and custom RPC configuration, WalletConnect simplifies direct dApp authentication inside Trezor Suite without requiring a browser extension.
How do you connect Trezor to dApps using WalletConnect inside Trezor Suite?
WalletConnect integration in Trezor Suite (available since mid-2025) enables direct dApp authentication by scanning a QR code β removing browser-extension dependency during the pairing process.
Steps β WalletConnect dApp pairing:
- Open Trezor Suite, connect the device via USB, and enter the PIN.
- Click the WalletConnect icon in Trezor Suite.
- On the target dApp, click Connect Wallet β WalletConnect to generate a QR code.
- Scan the QR code using the WalletConnect panel in Trezor Suite.
- Approve the connection β the dApp authenticates the Trezor account.
- All dApp transactions route to the device for physical button confirmation.
Does WalletConnect replace MetaMask for Trezor users?
| Feature | WalletConnect | MetaMask |
| Browser extension required | No | Yes |
| Custom EVM RPC configuration | Limited | Full |
| Safari compatibility | Yes | Yes |
| WebUSB dependency | None | Required for hardware pairing |
| DeFi protocol coverage | Most major protocols | All EVM dApps |
| Best for | Quick authentication without extension | Advanced network configs |
- WalletConnect removes browser-extension dependency during dApp authentication β relevant for users who avoid MetaMask’s extension due to extension-based phishing risk.
- MetaMask remains preferable when custom EVM network configuration is needed β Trezor Suite does not accept user-defined RPC URLs for networks not natively listed.
Is Trezor Safe 3 enough for most users?
Safe 3 provides EAL6+ Secure Element protection, open-source firmware, SLIP-39 Shamir Backup support, and WalletConnect dApp access at $79 β sufficient for the majority of self-custody use cases. The main limitation is the 0.96-inch monochrome display, which makes passphrase entry and address verification less comfortable than Safe 5’s touchscreen.
Trezor Safe 3 vs Safe 5 – which should you buy?
| Feature | Safe 3 | Safe 5 |
| Price | ~$79 | ~$129 |
| Screen | 0.96″ mono, 2 buttons | 1.54″ touchscreen, haptic |
| Secure Element | EAL6+ | EAL6+ |
| Default backup | 12-word SLIP-39 | 20-word SLIP-39 Shamir |
| Passphrase entry | Button navigation | Touch keyboard β faster |
| Address verification | Small screen | Larger, clearer screen |
| Gorilla Glass | β | Gorilla Glass 3 |
| Best for | Budget-conscious multi-coin users | Users entering passphrases frequently |
- Safe 3 is sufficient for users who primarily use Trezor Suite on desktop β the button interface works well for infrequent transaction confirmation.
- Safe 5’s touchscreen meaningfully reduces the risk of passphrase entry errors β the larger keyboard and haptic feedback make character-level verification more reliable than button-based scroll navigation.
Which Trezor model is best for iPhone?
Safe 7 is the only Trezor model with full iPhone support β it connects via Bluetooth to the Trezor Suite iOS app, enabling sending, swapping, device setup, and firmware updates. Safe 3, Safe 5, and Model One are limited to view-only mode on iPhone because iOS does not support USB-C hardware wallet connections.
| Feature | Safe 3/5/Model One on iPhone | Safe 7 on iPhone |
| Check balance | β | β |
| Receive crypto | β | β |
| Send crypto | β | β |
| Swap crypto | β | β |
| Device setup | β | β |
| Firmware update | β | β |
Does Trezor work with iPhone – iOS connection limitations explained?
iOS does not support USB-C connections for hardware wallet operations β this is an Apple platform restriction, not a Trezor design choice. Safe 3, Safe 5, and Model One enter view-only mode on iPhone: checking balances, receiving, and buying are available but sending, swapping, and device management are not.
- Safe 7’s Bluetooth encrypted wireless channel bypasses the iOS USB restriction β providing full hardware wallet functionality on iPhone and iPad through the Trezor Suite iOS app.
- Android users can connect all Trezor models via USB-C for the complete Trezor Suite mobile experience β USB device communication is fully supported across Android versions.
What is the Trezor passphrase and how does it create a hidden wallet?
The passphrase extends the seed phrase into a separate derivation path that generates different private keys and wallet addresses β producing a hidden wallet accessible only when the exact passphrase is entered. The standard wallet (no passphrase) and hidden wallet coexist independently from the same recovery seed.
- The passphrase is case-sensitive, space-sensitive, and character-exact β “Trezor” and “trezor” derive completely unrelated hidden wallets with no error indication.
- Trezor never stores the passphrase β it is re-entered each session, verified against the deterministic derivation result, with no reference value stored on the device.
- Should beginners use Shamir Backup? Yes β SLIP-39 Shamir Backup with a 2-of-3 threshold provides meaningfully better protection against single-point loss than a standard BIP-39 single-share backup, and Safe 3/5/7 support it natively.
What happens if you enter the wrong passphrase when connecting Trezor?
Entering an incorrect passphrase opens a different valid hidden wallet with zero balance and no error message. The device cannot identify an “incorrect” passphrase because every passphrase is cryptographically valid β the hidden wallet content is the only verification.
- Test any new passphrase by verifying the expected receive address appears before depositing funds into a passphrase-protected account.
- A forgotten passphrase results in permanent loss of the hidden wallet β neither Trezor support nor any service can reconstruct a forgotten passphrase.
Trezor vs Ledger – setup and connection comparison
| Feature | Trezor Safe 3 | Ledger Nano X |
| Firmware source | Open-source (GitHub) | Closed-source Secure Element |
| Secure Element | EAL6+ | EAL5+ (Nano X) |
| First-time connection | USB-C β Trezor Suite | USB-C β Ledger Wallet app |
| Ships with firmware | No β user installs | No β user installs |
| MetaMask support | Yes | Yes |
| WalletConnect | Built into Trezor Suite | Built into Ledger Wallet |
| iOS full support | Safe 7 only (BT) | Nano X (BT) |
| Backup standard | SLIP-39 Shamir or BIP-39 | BIP-39 (24-word) |
| Price entry-level | ~$79 (Safe 3) | ~$79 (Nano X) |
- Trezor’s open-source firmware is its primary security differentiator β the complete signing codebase is publicly auditable on GitHub, while Ledger’s Secure Element firmware remains proprietary.
- Both wallets require user-initiated firmware installation on first connection β neither ships with pre-loaded firmware to prevent supply-chain tampering.
Why is Trezor not detected – troubleshooting connection issues
| Issue | Cause | Fix |
| Device not recognized in Suite | USB cable data-only (no data lines) | Replace with data-capable cable β test with a different USB port |
| WebUSB error in browser | Safari does not support WebUSB | Use Chrome or Firefox for web app connections |
| PIN entry loops | PIN entered incorrectly β 16 wrong attempts wipe device | Recount attempts carefully β device wipes after 16 failures |
| Firmware installation frozen | USB connection interrupted during install | Reconnect immediately β if device unresponsive, enter bootloader mode by holding both buttons during connection |
| Trezor not detected in MetaMask | Outdated MetaMask version or popup blocked | Update MetaMask β allow the Trezor popup window in browser settings |
| Safe 7 Bluetooth not pairing | iOS Bluetooth permissions not granted | Settings β Bluetooth β grant Trezor Suite access |
- Can you use Trezor without Trezor Suite? Yes – MetaMask, Electrum, Exodus, Rabby, and other third-party wallets manage Trezor accounts independently of Suite for their respective supported assets.
- What happens if Trezor disconnects during setup? If disconnection occurs during firmware installation, the device may enter bootloader mode automatically – reconnect and Suite resumes from the last completed step in most cases.
Security model – how Trezor authenticates and signs
- The secure boot chain verifies the firmware signature cryptographically before loading any code – compromised or unsigned firmware is rejected at the hardware level.
- Entropy generation uses the Secure Element’s true random number generator for seed creation – hardware entropy prevents the seed from being reproduced by any software-based random source.
- Challenge-response verification during the Secure Element authenticity check confirms the chip was manufactured by Trezor – a cloned or replaced chip fails this cryptographic test.
- Side-channel attack resistance is addressed by the EAL6+ certification on Safe 3/5/7 – the chip’s physical design limits power analysis and electromagnetic leakage that could theoretically expose key material.
- HID protocol communication between the device and the computer uses standard USB Human Interface Device signaling – it does not require custom drivers on Windows, macOS, or Linux.
- 16 wrong PIN attempts trigger a full device wipe – the recovery seed restores complete wallet access after the PIN-protection wipe.
FAQ
How do I connect my Trezor to my computer?
Connect the cold wallet via USB cable (USB-C for Safe 3/5/7, Micro-USB for Model One) and open Trezor Suite from suite.trezor.io. Suite detects the device via HID protocol and displays the dashboard for initialized devices. For first-time setup, Suite guides through firmware installation, seed backup, and PIN creation. Chrome and Firefox support WebUSB for the web app β Safari does not.
How do I set up a Trezor for the first time?
Connect via USB β Suite detects device β install firmware (Standard or Bitcoin-only) β verify firmware fingerprint on both Suite and device screen β Secure Element authenticity check (Safe 3/5/7) β create wallet β write down every recovery seed word in numbered order β confirm seed on device β set PIN Code. Total time approximately 15 minutes. Model One requires Trezor Suite Desktop only.
How do I connect Trezor to MetaMask?
Connect the cold wallet via USB and unlock with PIN. In MetaMask, click account selector β Add account or hardware wallet β Hardware wallet β Trezor β approve public key export on device β select Ethereum accounts β Unlock. MetaMask receives the extended public key only β private keys remain on the hardware signer and every transaction requires physical button confirmation.
Does Trezor work with iPhone?
Safe 3, Safe 5, and Model One are view-only on iPhone β balance checking, receiving, and buying are available but sending, swapping, and device setup require a desktop or Android connection. Safe 7 provides full iPhone functionality via Bluetooth. iPhone users requiring complete mobile access should initialize the Safe 7 rather than any USB-only model.
What is Trezor Bridge?
Trezor Bridge is legacy USB communication software used by older browser-based wallet interfaces. Current Trezor Suite handles device communication natively via WebUSB (Chrome/Firefox) and HID protocol (desktop) without requiring Bridge installation. Bridge may still be needed for some older third-party wallet integrations that have not migrated to WebUSB-based device communication.
How do I connect Trezor to DeFi?
Two authentication methods are available: WalletConnect (built into Trezor Suite) and MetaMask browser extension. For WalletConnect, open Trezor Suite β click the WalletConnect icon β scan the dApp QR code β approve. For MetaMask, pair via hardware wallet integration and interact with any EVM protocol. Both methods require physical button confirmation on the cold wallet for every transaction.
What is the difference between Trezor Safe 3 and Safe 5?
Safe 3 ($79) uses a 0.96-inch monochrome display with two navigation buttons and generates a 12-word SLIP-39 seed by default. Safe 5 ($129) uses a 1.54-inch Gorilla Glass 3 touchscreen with haptic feedback and generates a 20-word SLIP-39 Shamir Backup by default. Both carry EAL6+ Secure Element certification and identical open-source firmware. Safe 5’s touchscreen reduces passphrase entry errors and improves address verification ergonomics.
How long does the Trezor first-time setup take?
Approximately 15 minutes for Safe 3 and Safe 5 β including firmware installation, Secure Element authenticity check via challenge-response verification, recovery seed creation from hardware entropy, seed confirmation, and PIN setup. The seed backup step should not be rushed β incorrect or incomplete seed recording is the leading cause of permanent wallet access loss.