Staking Polygon (POL) requires one critical piece of context before you start: all native Polygon staking transactions happen on Ethereum mainnet, not the Polygon chain. Your POL must be in ERC-20 form in an Ethereum wallet, and you pay ETH gas fees — not POL — for every delegation, reward claim, and unbonding transaction. This guide walks through exactly how to stake POL in 2026 using the native Polygon Staking Portal, how to stake securely via Ledger hardware wallet, how liquid staking with Stader Labs works as an alternative, and how to stake through exchanges if self-custody adds too much complexity.
What You Need Before You Start Staking Polygon
Before visiting the Polygon Staking Portal, confirm the following:
- POL in ERC-20 form on Ethereum mainnet — not on the Polygon PoS chain. If your POL is on Polygon PoS (purchased on Polygon or held in a Polygon chain wallet), you must bridge it to Ethereum first using the Polygon Portal at portal.polygon.technology before you can stake it.
- ETH for gas — have at least 0.1 ETH in the same wallet. Every staking transaction costs Ethereum gas. First-time delegation requires two separate transactions (explained below), and each reward claim costs additional ETH.
- A compatible wallet — MetaMask browser extension or mobile wallet via WalletConnect is the most widely supported option. Coinbase Wallet, Rabby Wallet, and any WalletConnect-enabled wallet also work with the Polygon Staking Portal.
If you need to bridge POL from Polygon PoS to Ethereum, expect the bridge transaction itself to take 20–40 minutes and cost ETH gas.
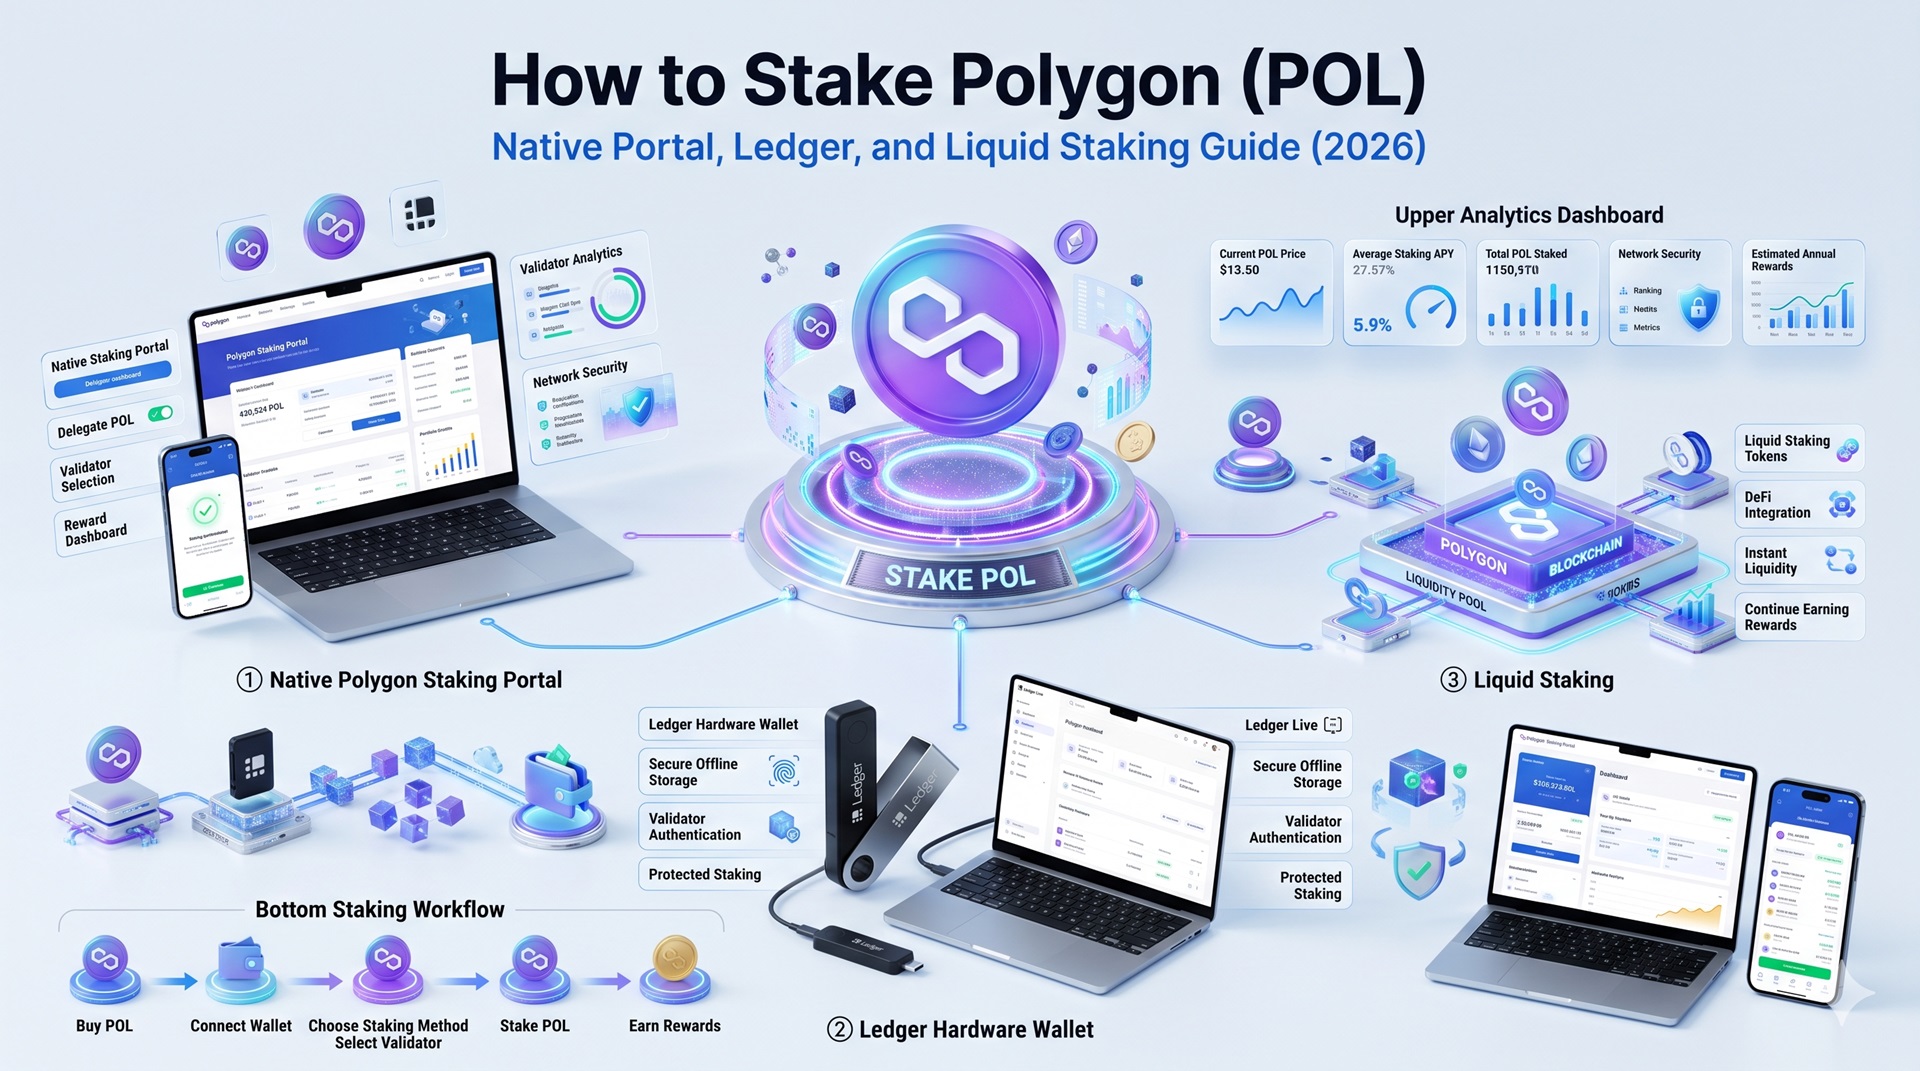
How to Stake Polygon (POL) on the Native Staking Portal
Step 1 – Switch MetaMask to Ethereum Mainnet
Open MetaMask and confirm the selected network is Ethereum Mainnet — not Polygon PoS. The Polygon Staking Portal’s smart contracts are deployed on Ethereum, so attempting to connect on the Polygon network will not work.
If MetaMask defaults to Polygon, click the network dropdown in the top left and select “Ethereum Mainnet.”
Step 2 – Connect Your Wallet to the Polygon Staking Portal
Navigate to staking.polygon.technology. Click “Connect Wallet” in the top right corner. Select MetaMask from the wallet options, or choose WalletConnect if using a mobile wallet. Approve the connection request in your wallet extension.
Once connected, your wallet address and POL balance appear on the dashboard.
Security check: Before connecting, verify the URL is exactly staking.polygon.technology. Phishing sites mimicking the staking dashboard remain an active threat in the Polygon ecosystem. Do not connect your wallet from a link in any email, Discord message, or social post.
Step 3 – Browse Validators and Choose One to Delegate
Click “Become a Delegator” on the portal homepage. This displays the full list of active validators on Polygon’s 105-validator set.
Evaluate validators on three criteria:
- Checkpoint signing rate — aim for 99–100%. Validators with lower rates may reduce your rewards proportionally.
- Commission rate — the percentage of your rewards the validator keeps. Typical range is 0–10%. Lower commission means more rewards to you, but an extremely low rate from an unestablished validator warrants caution.
- Total stake — a proxy for reliability, though larger is not always better. Avoid validators with very high concentration of total network stake, as this affects decentralization.
You can also check validator history and uptime at validator.info/polygon for additional data before deciding.
Step 4 – Two Transactions Required – What First-Time Stakers Don’t Expect
This is the step most guides skip: your first-ever delegation on Polygon requires two separate Ethereum transactions, not one.
The first transaction is a spend approval — you authorize the Polygon staking smart contract to access your POL tokens. This is a standard ERC-20 allowance transaction. MetaMask will show a prompt asking you to approve the contract’s access to your POL. Confirm this transaction and pay the Ethereum gas fee.
Wait for the first transaction to confirm on Ethereum (typically 15–60 seconds). Only after confirmation does the second transaction become available.
The second transaction is the actual delegation — this is where your POL is locked into the staking contract and assigned to your chosen validator. Click “Delegate,” enter the amount of POL you want to stake, click “Continue,” and confirm the second transaction in MetaMask.
Total cost: two Ethereum gas fees. Budget $10–$25 total for the first delegation at typical gas prices.
Subsequent delegations to the same validator only require the single delegation transaction — the spend approval is a one-time step per wallet address.
Step 5 – Wait for 12 Checkpoints
After confirming your delegation transaction, your staking position will not immediately appear in the Polygon Staking Dashboard. You need to wait for 12 Ethereum checkpoints to pass before your delegation is reflected.
A checkpoint is a transaction submitted by Polygon validators to Ethereum mainnet that records the state of the Polygon chain. Checkpoints are submitted approximately every 30–60 minutes depending on Ethereum network conditions. Twelve checkpoints therefore take approximately 2–12 hours after your delegation transaction is confirmed.
During this window, verify your delegation transaction on Etherscan using the transaction hash from MetaMask. Once 12 checkpoints pass, your delegation and accruing rewards appear in “My Account” on the Polygon Staking Dashboard.
Step 6 – Claiming Your Rewards
Native Polygon staking rewards accumulate on-chain automatically with each checkpoint. However, they do not transfer to your wallet automatically — you must manually submit a claim transaction to move rewards from the staking contract to your wallet.
Each claim transaction costs ETH gas (typically $5–$12 at moderate network activity). For small staking positions, accumulate rewards over weeks or months before claiming to minimize the gas cost as a percentage of claimed rewards.
After claiming, you can manually redelegate your rewards to the same or a different validator to compound your position — this requires an additional delegation transaction with its own gas cost. There is no automatic compounding on the native portal.
—
How to Stake Polygon (POL) with a Ledger Hardware Wallet
For holders prioritizing maximum security, Ledger hardware wallet staking keeps your private keys offline throughout the entire staking process.
Setup Requirements
1. Install the Ethereum app (not the Polygon app) on your Ledger device via Ledger Live — all Polygon staking happens on Ethereum mainnet
2. Connect your Ledger to MetaMask using MetaMask’s “Add Hardware Wallet” feature
3. Enable Blind Signing on the Ledger Ethereum app (Settings → Blind signing → Enabled) — Polygon’s staking contract requires blind signing for the delegation transaction
Staking Steps with Ledger
The staking process mirrors the native portal steps above, with the addition of physical confirmation on the Ledger device for each transaction:
1. Connect Ledger to MetaMask and select your Ledger-derived Ethereum address
2. Ensure the Ledger Ethereum app is open on the device
3. Follow Steps 2–4 from the native portal guide above
4. When MetaMask prompts for confirmation, review the transaction details on your Ledger screen and physically press both buttons to confirm
5. Repeat the physical confirmation for the second delegation transaction
After completing delegation, your staked position is secured by Ledger’s Secure Element chip. Your private keys never leave the hardware device, and staking transactions cannot be approved without physical button confirmation on the device.
—
How to Stake Polygon via Liquid Staking (Stader Labs)
Stader Labs offers an alternative staking path through MaticX, its liquid staking derivative. When you deposit POL into Stader, you receive MaticX — a liquid, tradeable token representing your staked position.
Key differences from native portal staking:
- No two-transaction approval complexity — Stader’s interface streamlines the process
- MaticX can be used in DeFi while your underlying POL earns staking rewards
- Instant exit by selling MaticX on Uniswap — no unbonding wait required
- Staker Labs fees (approximately 10% of staking rewards) reduce net APY vs. native delegation
Steps: Visit staderlabs.com/polygon, connect MetaMask on Ethereum mainnet, enter the amount of POL to stake, approve the spend transaction, and confirm the stake transaction. MaticX appears in your wallet once confirmed.
How to Stake Polygon on Exchanges
For holders who prefer not to manage Ethereum wallets and gas fees, centralized exchanges handle all staking operations on the backend:
- Coinbase — search for POL in the Earn section, select the staking option, enter the amount, and confirm. No ETH required. Rewards are credited to your Coinbase balance.
- Kraken — navigate to Staking under the Earn tab, select POL, choose flexible or bonded staking, enter the amount, and confirm. Bonded staking offers higher APY with a 3–28 day lockup.
- Binance Earn — search for POL in Simple Earn, subscribe to a 30, 60, or 90-day fixed-term product during the subscription window. Subscriptions are limited and fill quickly.
- Bybit — find POL in the Earn section, select the flexible staking product, enter the amount, and confirm. Lower APY but fully liquid.
Exchange staking requires no ETH, no validator selection, and no manual reward claiming.
FAQ
Do I need ETH to stake Polygon?
Yes, if you stake through the native Polygon Staking Portal or Stader Labs on Ethereum. All Polygon PoS staking smart contracts operate on Ethereum mainnet, so ETH gas fees apply to every transaction. Have at least 0.1 ETH in your wallet before starting. Exchange staking on Coinbase, Kraken, or Binance absorbs gas costs internally — no ETH required.
What wallets work with the Polygon Staking Portal?
MetaMask (browser extension) is the most widely supported option and has the most documentation for Polygon staking. Coinbase Wallet, Rabby Wallet, and any WalletConnect-compatible wallet also work with the Polygon Staking Portal. Ledger hardware wallets can be used by pairing with MetaMask via the hardware wallet connection feature.
How long until I start earning rewards after staking?
Your staking position becomes active and rewards begin accruing after 12 Ethereum checkpoints pass following your delegation transaction. This typically takes 2–12 hours depending on Ethereum network congestion at the time of staking. You can confirm your delegation is active in the “My Account” section of the Polygon Staking Dashboard.
How do I claim Polygon staking rewards?
Navigate to the Polygon Staking Dashboard at staking.polygon.technology, connect your wallet, and go to “My Account.” Under “Your Delegations,” click “Claim Rewards” next to each validator you have delegated to. Each claim requires a new Ethereum transaction with its own gas fee. Accumulate rewards over time before claiming to reduce gas as a share of claimed rewards.
Can I use a hardware wallet to stake Polygon?
Yes. Ledger hardware wallets support Polygon staking when connected to MetaMask. Install the Ethereum app on your Ledger (not the Polygon app), enable Blind Signing in the Ethereum app settings, and pair your Ledger with MetaMask. All delegation and claim transactions will require physical confirmation on the Ledger device, keeping your private keys offline throughout.